This article may contain references to products or services from one or more of our advertisers or partners. We may receive compensation when you click on links to those products or services. Nonetheless, our opinions are our own.
The information presented in this article is accurate to the best of our knowledge at the time of publication. However, information is subject to change, and no guarantees are made about the continued accuracy or completeness of this content after its publication date.
- Choosing the Right Peanuts for Peanut Butter
- Preparing the Vitamix Ascent X5 for Peanut Butter
- Ingredients Required
- Equipment Required
- Roasting Peanuts for Maximum Flavor
- Peanut Butter Blending Times and Textures
- Tips for Creamy Peanut Butter
- Storing Homemade Peanut Butter
- Flavor Variations for Homemade Peanut Butter
- Health Benefits of Peanut Butter
- Nutrition Information for Homemade Peanut Butter
- Alternative Nut Butters to Try
- Expert Tips for Homemade Peanut Butter
- Creative Ways to Use Peanut Butter
- Reasons to Make Your Own Peanut Butter
- Final Thoughts on Homemade Peanut Butter
- Frequently Asked Questions
- What ingredients are needed to make Peanut Butter in the Vitamix Ascent X5?
- How should the Peanuts be prepared?
- What steps are followed to make Peanut Butter?
- How is the readiness of Peanut Butter determined?
- Can Peanut Butter be customized with flavors?
- How should homemade Peanut Butter be stored?
- Can other Nut Butters be made with the Vitamix Ascent X5?
- Recommended Reads
Choosing the Right Peanuts for Peanut Butter
Selecting the right peanuts impacts both flavor and texture in homemade peanut butter. Virginia peanuts are large and crunchy, adding a nutty flavor. Runner peanuts are uniform in size and roast evenly, producing a smooth texture. Spanish peanuts provide a robust, earthy taste, while Valencia peanuts offer a sweet flavor and smaller size for a unique variation. Consider blending types to create a flavor profile suited to your preference.
Preparing the Vitamix Ascent X5 for Peanut Butter
Before making peanut butter, prepare your Vitamix Ascent X5 to ensure smooth blending. Gather ingredients and tools, including roasted or raw peanuts, optional salt, optional oil for texture, and a spatula. Ensure the blender base is clean and the container is secure. Check the blades for debris, then add the peanuts. Start at low speed and gradually increase to high, scraping down the sides to achieve an even, creamy texture.
Ingredients Required
Required ingredients include roasted or raw peanuts, optional salt, optional oil, and optional flavorings, such as honey, cinnamon, or cocoa powder. Selection affects taste, texture, and nutritional value. Using high-quality ingredients maximizes flavor and creaminess. The freshness of the peanuts is particularly important for the best results.
Equipment Required
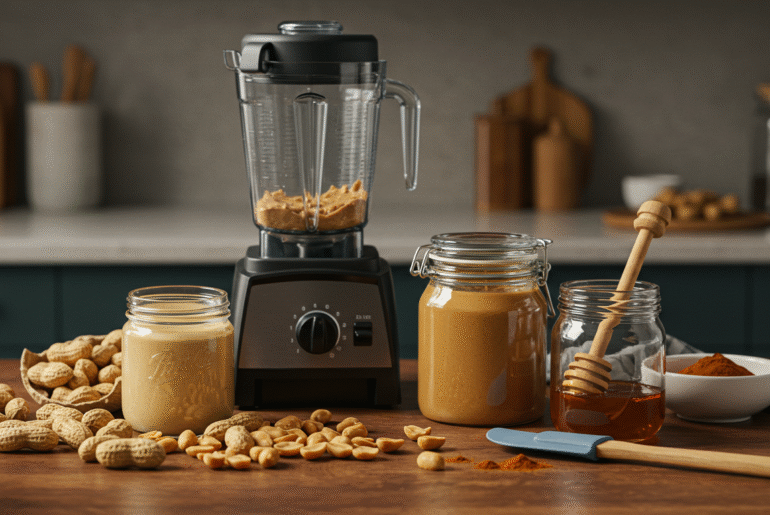
Necessary equipment includes the Vitamix Ascent X5 or another high-powered blender, a spatula for scraping, a baking sheet for roasting, and an airtight container for storage. Proper preparation ensures smooth, even blending and helps achieve consistent texture. Clean, functional tools contribute to efficiency and safety during preparation.
Roasting Peanuts for Maximum Flavor
Roasting peanuts enhances flavor and aroma. Preheat the oven to 350°F (175°C) and spread raw peanuts in a single layer on a baking sheet. Roast for 10–15 minutes, stirring occasionally to prevent burning. Cool slightly before blending. Optional ingredients like salt, honey, or cocoa powder can be added during blending. The Vitamix blends the peanuts into a smooth consistency suitable for your desired texture.
Peanut Butter Blending Times and Textures
| Peanut Butter Type | Blend Time | Texture |
|---|---|---|
| Crunchy | 1–2 minutes | Chunky with pieces |
| Smooth | 2–3 minutes | Velvety and creamy |
| Flavored | 3–4 minutes | Varies based on added ingredients |
Adjust oil gradually if needed. Scraping down the sides ensures a uniform texture. Patience during blending results in creamy, flavorful peanut butter.
Tips for Creamy Peanut Butter
Choose fresh peanuts for best results. Add a small amount of oil if the mixture is too thick. Use the tamper to push peanuts down for even blending. Blend in stages, starting at low speeds and increasing gradually. Allow the peanut butter to rest before transferring to a jar for a slightly thicker texture. Flavor enhancers like honey, cinnamon, or sea salt can be incorporated during blending.
Flavor Enhancements for Peanut Butter
| Ingredient | Purpose |
|---|---|
| Honey | Adds natural sweetness |
| Cinnamon | Enhances flavor depth |
| Sea Salt | Balances sweetness for richer taste |
Experiment with combinations to achieve a peanut butter tailored to your taste.
Voted "Best Overall Budgeting App" by Forbes and WSJ
Monarch Money helps you budget, track spending, set goals, and plan your financial future—all in one app.
Get 50% OFF your first year with code MONARCHVIP
Storing Homemade Peanut Butter
Use an airtight container to maintain freshness and prevent contamination. Glass jars allow the visual tracking of quantities. Store in a cool, dark place, or refrigerate for longer shelf life, noting that chilled peanut butter may thicken. Use clean utensils and label containers with the preparation date. Stir separated oils back into the mixture before use.
| Storage Method | Duration |
|---|---|
| Airtight container (pantry) | 2–3 weeks |
| Refrigeration | 1–3 months |
| Freezing (small portions) | 6–12 months |
Freezing small portions allows convenient access to limited amounts as needed.
Flavor Variations for Homemade Peanut Butter
Enhance peanut butter with sweeteners, spices, nuts, or fruits. Drizzle honey or maple syrup for natural sweetness. Add cinnamon or vanilla extract for warmth. Mix in chopped nuts for added texture or blend freeze-dried fruits for a fruity twist. These variations create a customizable, nutritious spread suitable for multiple culinary uses.
| Flavor Component | Benefit |
|---|---|
| Honey | Natural sweetness and energy boost |
| Cinnamon | Antioxidant properties and warm flavor |
| Almonds | Added crunch and healthy fats |
| Freeze-Dried Fruits | Enhanced flavor without added sugars |
Customizing ingredients allows each batch to reflect personal taste preferences.
Health Benefits of Peanut Butter
Peanut butter provides protein, healthy fats, and fiber, contributing to satiety. Homemade versions avoid added sugars, hydrogenated oils, and preservatives. Regular, moderate consumption can support a balanced diet. Nutrients support energy levels and can complement a variety of meals and snacks.
Nutrition Information for Homemade Peanut Butter
Homemade peanut butter contains approximately 7–8g of protein, 16g of healthy fats, 2–3g of fiber, and 180–200 calories per 2-tablespoon serving. Nutrient-dense content supports energy and satiety. Avoiding additives improves nutritional value compared with commercial varieties. It can be incorporated into a balanced diet for overall wellness.
Alternative Nut Butters to Try
Alternative nut butters include almond, cashew, hazelnut, and mixed nut butters. Seed butters such as sunflower or tahini also provide unique flavors. Trying different nut or seed bases expands culinary options and nutritional variety. Each type offers distinct textures, flavors, and health benefits.
Expert Tips for Homemade Peanut Butter
Roast peanuts evenly for enhanced flavor. Use a tamper tool for consistent blending. Gradually add oil for desired texture. Experiment with spices and sweeteners to customize flavor. Store in airtight containers and stir before use to maintain freshness and even consistency. Following these tips ensures high-quality results.
Roasting the Peanuts
Preheat the oven to 350°F (175°C). Spread raw peanuts evenly on a baking sheet and roast for 10–15 minutes, stirring occasionally to avoid burning. Allow them to cool slightly before blending. This process enhances natural flavors and aroma for optimal peanut butter taste.
Blending the Peanuts
Place roasted peanuts in the Vitamix Ascent X5 container. Start blending at low speed and gradually increase it to high. Stop periodically to scrape down the sides. Add optional ingredients such as salt, oil, or sweeteners. Blend until the desired smoothness or chunkiness is achieved. Transfer to an airtight container for storage.
Notes and Troubleshooting
If the peanut butter is too thick, add oil and blend again. If too runny, blend without adding oil to thicken. Scrape down the sides to avoid uneven texture. Adjust flavor with optional ingredients. Store in a cool, dark place or refrigerate for extended shelf life to maintain quality.
Creative Ways to Use Peanut Butter
Peanut butter can be spread on toast or sandwiches, blended into smoothies, used as a dip for fruits or vegetables, incorporated into sauces, baked goods, or oatmeal, and mixed with chocolate or honey for treats. Versatile applications make it a valuable ingredient in both sweet and savory dishes. Creative use enhances both flavor and nutrition.
Reasons to Make Your Own Peanut Butter
Homemade peanut butter allows full control over ingredients, flavor, and texture. It avoids unnecessary additives and preservatives. Customization enables personalization according to taste and dietary preferences. Making peanut butter at home ensures a fresh and nutritious spread for everyday use.
Final Thoughts on Homemade Peanut Butter
Making peanut butter at home provides control over taste, texture, and nutritional quality. Using fresh, high-quality ingredients ensures superior flavor. Experimenting with flavors and textures allows customization to personal preference. Proper preparation, blending, and storage maintain freshness and consistency for a versatile, wholesome spread.
Frequently Asked Questions
What ingredients are needed to make Peanut Butter in the Vitamix Ascent X5?
Roasted peanuts are the primary ingredient. Salt, oil, and sweeteners such as honey or maple syrup can be added optionally. Flavorings like cocoa powder or cinnamon can enhance taste. Using fresh, high-quality peanuts produces the best results.
How should the Peanuts be prepared?
Measure the desired amount, typically about 2 cups. Roasting is recommended if using raw peanuts. Add salt if using unsalted peanuts. No further preparation is needed before blending.
What steps are followed to make Peanut Butter?
Place peanuts in the Vitamix container, secure the lid, and start blending on low. Gradually increase to high speed while scraping down the sides. Blend until creamy or chunky, depending on preference. Optional ingredients can be added during the final blending stage.
How is the readiness of Peanut Butter determined?
The peanut butter is ready when it reaches a smooth, creamy texture. For crunchy peanut butter, reserve some peanuts to stir in later. Adjust flavor as desired. Texture and consistency should meet personal preference.
Can Peanut Butter be customized with flavors?
Yes, flavors like vanilla extract, cinnamon, or cocoa powder can be added. Sweeteners such as honey or agave syrup can also be included. Blend these with the peanuts toward the end. Customization allows a unique and personal spread.
How should homemade Peanut Butter be stored?
Store in a clean, airtight container. Refrigerate for an extended shelf life of 2–4 weeks. Smaller portions can be frozen for convenience. Stir before use if oil separates naturally.
Can other Nut Butters be made with the Vitamix Ascent X5?
Yes, almond, cashew, or other nut butters can be prepared using the same process. Simply replace peanuts with preferred nuts. Blend using the same technique until the desired texture is achieved. This allows versatile homemade spreads.

Reviewed and edited by Albert Fang.
See a typo or want to suggest an edit/revision to the content? Use the contact us form to provide feedback.
At FangWallet, we value editorial integrity and open collaboration in curating quality content for readers to enjoy. Much appreciated for the assist.
Did you like our article and find it insightful? We encourage sharing the article link with family and friends to benefit as well - better yet, sharing on social media. Thank you for the support! 🍉
Article Title: Homemade Peanut Butter Guide: Tips, Flavors, and Storage
https://fangwallet.com/2025/10/24/homemade-peanut-butter-guide-tips-flavors-and-storage/The FangWallet Promise
FangWallet is an editorially independent resource - founded on breaking down challenging financial concepts for anyone to understand since 2014. While we adhere to editorial integrity, note that this post may contain references to products from our partners.
The FangWallet promise is always to have your best interest in mind and be transparent and honest about the financial picture.
Become an Insider

Subscribe to get a free daily budget planner printable to help get your money on track!
Make passive money the right way. No spam.
Editorial Disclaimer: The editorial content on this page is not provided by any of the companies mentioned. The opinions expressed here are the author's alone.
The content of this website is for informational purposes only and does not represent investment advice, or an offer or solicitation to buy or sell any security, investment, or product. Investors are encouraged to do their own due diligence, and, if necessary, consult professional advising before making any investment decisions. Investing involves a high degree of risk, and financial losses may occur including the potential loss of principal.
Source Citation References:
+ Inspo
There are no additional citations or references to note for this article at this time.


